
If you’ve now gotten your iOS device connected to your Mac as in the previous post, ane you are now capturing packets with Wireshark, it’s time to tour the interface a little and get to know it. After that, we will dive into what you can actually learn about your iOS device and it’s server connections using wireshark.
Before we get started, I want to shout out thanks to Chris Greer for his wonderful tutorials on the subject. Find him at http://youtube.com/c/ChrisGreer and follow him at @packetpioneer . There are tons of videos on programming but only a select few that are informative without wasting your time, and are up to date. Chris is an example of that. In my blogs I’m trying to focus on creating top flight enterprise-level mobile app experiences and on training in iOS and Swift. But Chris can give you a much broader foundation in packets and network communications.
Today I’ll cover just two Wireshark setup items. Colorizing and filtering. Colorizing seems at first glance like a trivial feature. Filtering is something we covered in our posts on Charles — but it’s different in Wireshark. In the world of packet capture, the data flies by so quickly that the human response time isn’t great enough to process it all. We need help. Colorizing and filtering are both designed to limit the data or highlight it so we wetbrains can understand it.
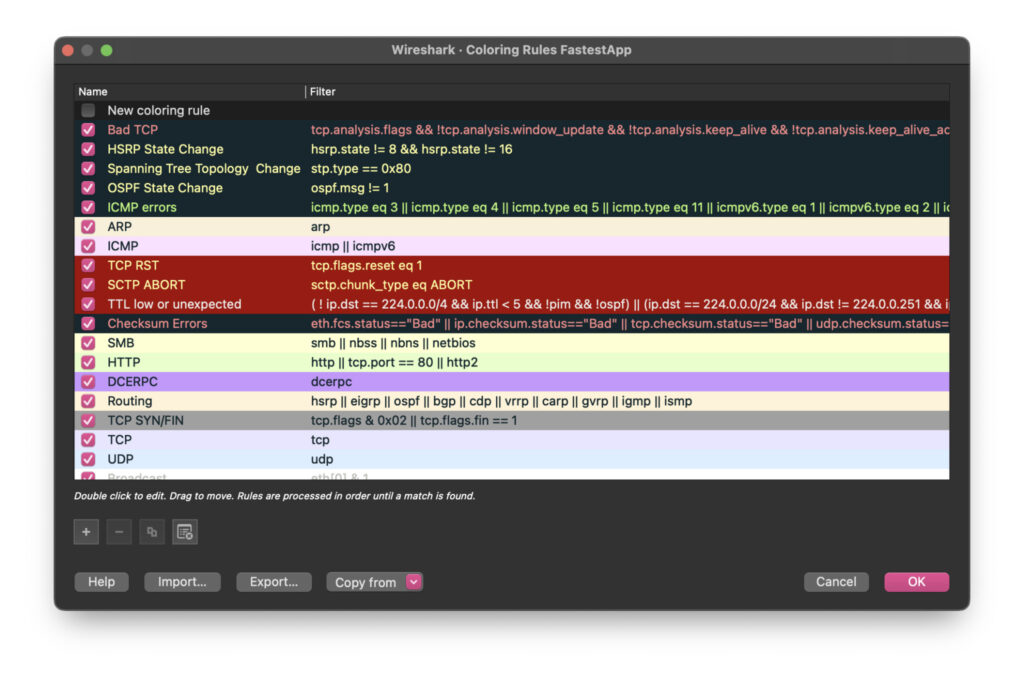
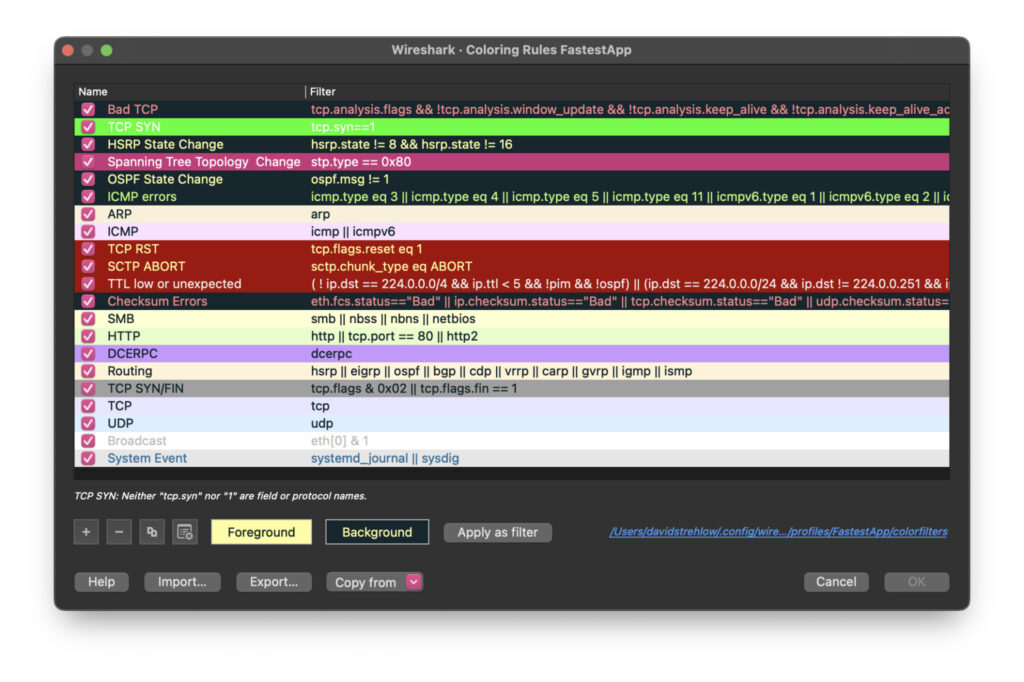
To colorize your packets enter Wireshark, go to the View menu and select ‘Coloring Rules…’ Cute name, right? Coloring rules: Don’t go outside the lines! In the modal that follows, hit the + button toward the lower left. You can now create a ‘New coloring rule’ Chris Greer showed us how to create a ‘syn’ rule, and that’s a good one. Click on the text field on the right, and enter ‘tcp.syn==1.’ In the left column, give it a suitable name and click the checkmark to activate it. The reason a ‘SYN’ is a good packet rule to filter on is that with each connection between the iPad and the server (or any client and server), the handshake is initiated in three parts, including the ‘SYN.’ So being able to highlight this step means being able to see a connection initiation in the stream of packets in wireshark. You see a connection being born!
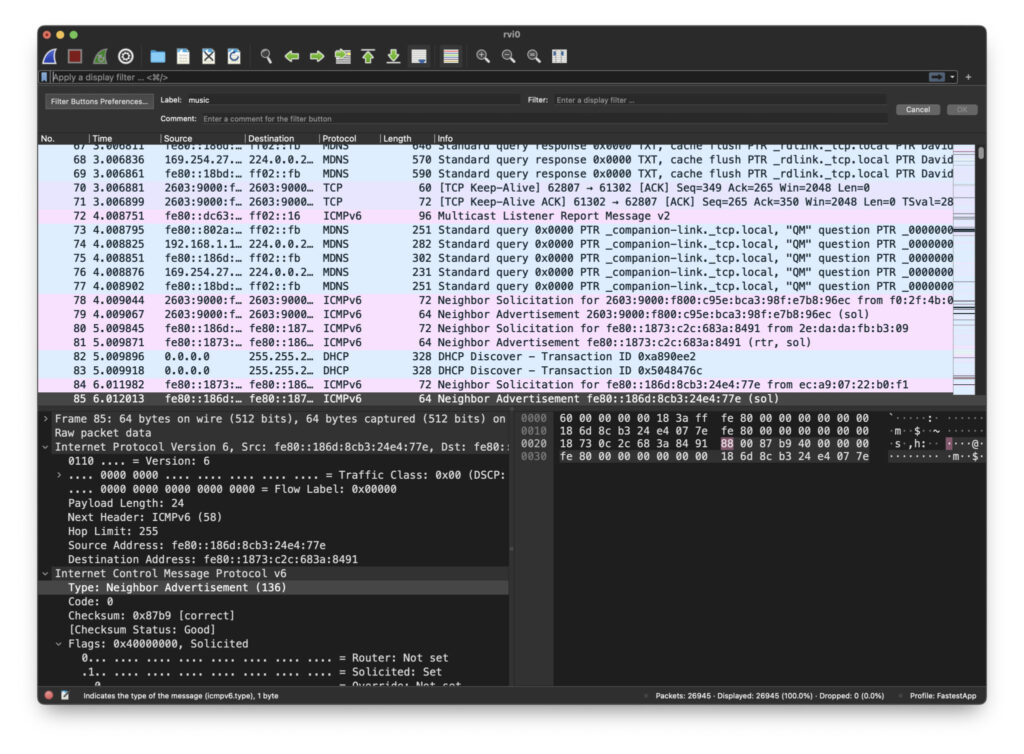
Next let’s apply a filter. Suppose you’re looking at a stream of packets in Wireshark and you see the words ‘Neighbor Advertisement’ as in the image above. You’d like to know more about what this means and how often it occurs. Select a row in your main stream that is a ‘Neighbor Advertisement’ row, so you can see the packet details in the lower left, as in the image. Right click on the ‘Type’ and go to ‘Select.’ This will automatically enter a filter for that type of packet.
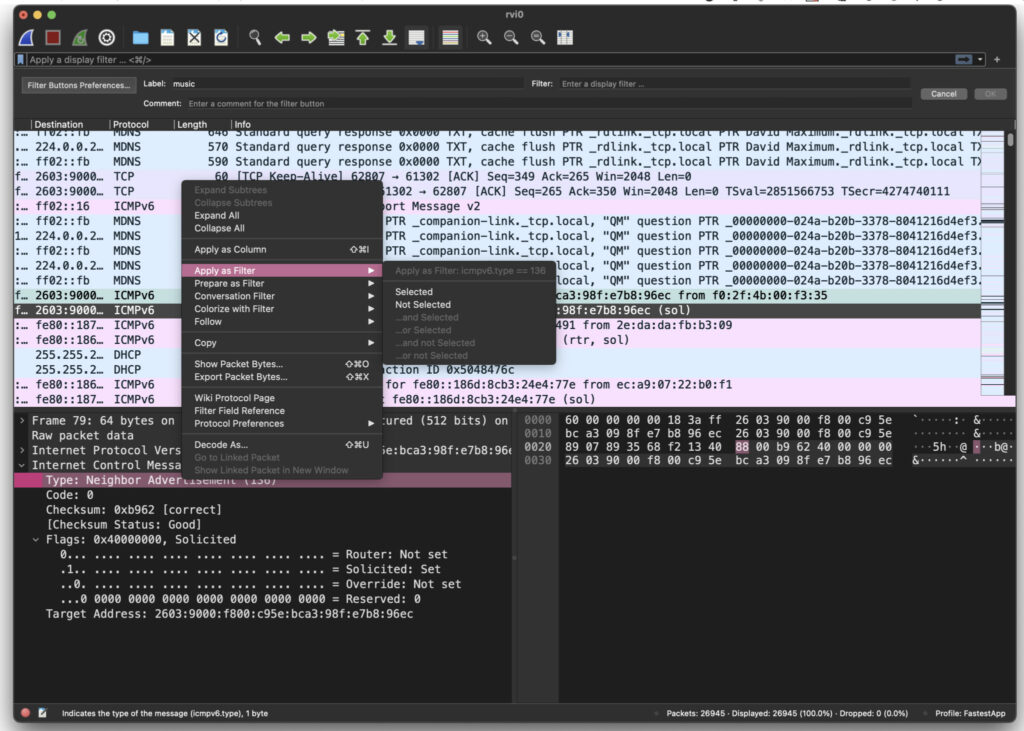
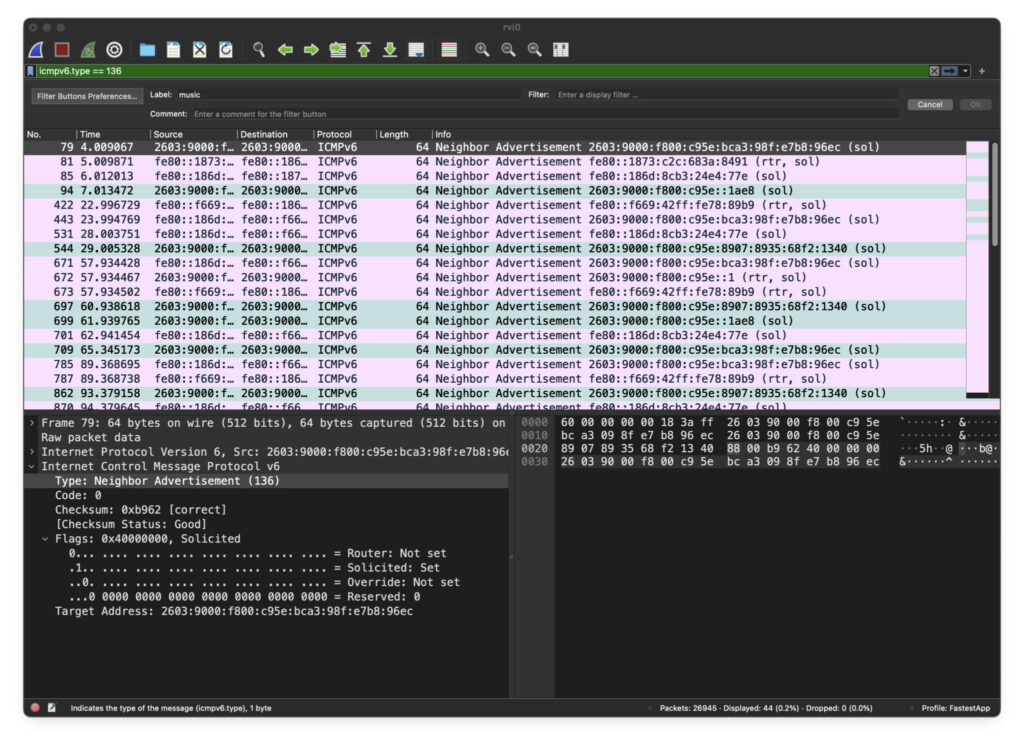
Notice that the filter field, with the green background, says we are filtering on icmpv6.type == 136. And the main display only has entries that are ‘Neighbor Advertisement.’
So whatever a Neighbor Advertisement is, I’m receiving a LOT of them. Can’t be that bad?


